
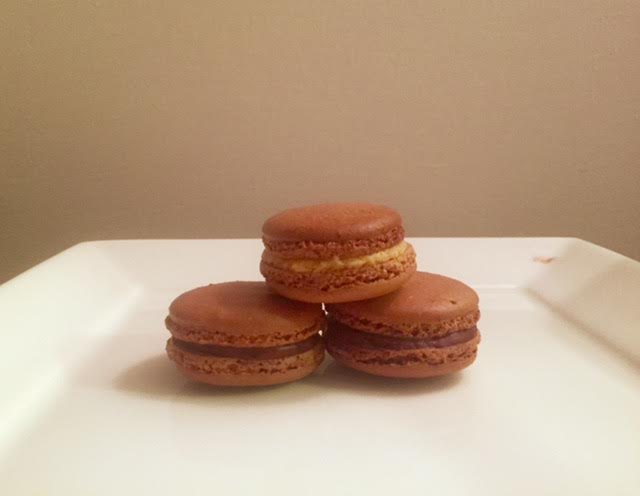
Chocolate Macarons
Salted Caramel & Chocolate Ganache Filling

See Updated Macaron Post HERE
These little suckers are definitely one of the hardest treats I’ve made in a while. 1st attempt ended with hollow shells, but they still tasted good! When I look back, I didn’t let them sit and I rushed through it a bit as I was baking and cooking dinner at the same time (never a good idea!). The 2nd attempt: I did a lot of research, found the “perfect” recipe, went through it step by step, following to a tee, piped out beautifully on the baking sheet, they’re lookin’ good… NOPE! They came out totally flat, chewy and not very tasty at all. There they go, in the garbage, slam the oven, grumble under my breath. Now, I’m determined. Poor Rob has now come to the realization, not only that I’m a little crazy and that the kitchen is a disaster, but we’re not eating dinner until closer to 8:30pm versus 7pm.
I took a deep breath, looked for the chocolate recipe that I found (because obviously if it’s chocolate it will work!) and started over. What I’ve learned when it comes to Macarons:
- Be patient (need to work on this one)
- Don’t get frustrated (guilty)
- Don’t rush it (guilty)
- Deep breath and a glass of wine can solve 1 – 3 above (guilty)
- Everyone’s “perfect” recipe is different, it’s all trial and error to find your own technique
Now, with all that behind me, I successfully made Macarons! As I mentioned, everyone has their own technique for these. Some say, no need to let the Macarons sit before putting them in the oven, you can add the sugar to the eggs right away, or add the whole flour/sugar mixture to the meringue all at once rather than in batches. Others say: fold 60 times, 30 times, 45 times to get the correct consistency. Let me just say, counting your folds? Really? C’mon, let’s simplify this a bit. You have to use your eye and your judgement a bit and that really just comes with time, trial & error (hence, my 3 attempts!), and some guidance, which you’ll hopefully get from the recipe below. What I like about this recipe is that it followed a lot of the “rules” that apply in general baking which I’ll be sure to point out as we go.
French Chocolate Macarons
What You Need:
- 2 Cups of Powdered Sugar
- 1 Cup of Almond Flour
- 3 Tablespoons of Unsweetened Cocoa Powder
- 1/4 Teaspoon of Fine Salt
- 3 Large Egg Whites (Room Temperature*)
*Rather than letting the eggs sit out, submerge them in warm water for 5 minutes
Prep:
- Line two baking sheets with parchment paper
- Preheat the oven to 350 Degrees F and arrange the rack in the middle of the oven
- Set up a large pastry bag with a 1/2-inch plain tip **Trick: Cut the tip of the bag, place the baking tip in, twist just above the tip and place the bag in an empty liquid measuring cup (one that holds at ~2 cups), fold the edges of the pastry bag over the edges of the measuring cup to create a a “bowl” in the bag to make it easier when the time comes and you wont get frosting/ganache/caramel/etc. all over the top of the bag before you use it. Image from Brave Tart:

Instructions:
- Sift together the Powdered Sugar, Almond Flour, Cocoa Powder and Salt. Sift an additional 1 – 2 times. Yes, 2 – 3 total sifts! It seems like a lot, but you need to make sure there are no clumps and the Almond Flour can be pretty thick. Push through as much of the Almond Flour you can and throw out any big clumps left over.
- Make the Meringue:
- Place the egg whites in the bowl of a standing mixer fitted with the whisk attachment. Beat on medium speed until opaque and foamy. Increase the speed to medium high & beat until the egg whites hold the line of the whisk, about 1 minute 30 seconds (roughly) then add the Sugar** This is part of the recipe that you see variations on. Some people say that waiting that minute or so to add the sugar doesn’t matter at all, but this way seemed to work best for me.
- Continue to whip on high speed until stiff peaks form and there is a clump of meringue in the whisk. This may take a couple of minutes, but make sure the meringue is stiff because it will deflate as you add in the flower. To get the clump out of the whisk, just tap it on the side of the bowl a couple times.
- Using a rubber spatula, gently fold the dry mixture into the egg whites in 4 batches folding each batch until just barely incorporated** Here’s the 2nd part of the recipe that you see variations. Typically when you’re combining ingredients, especially wet into dry it is done in batches or it will take forever to incorporate and the mix will end up over-mixed. While the meringue will deflate here, we want to make sure not to over-fold. My second attempt at Macarons I added all of the dry at once and I found that I over-folded the mix and the rounds came out flat with no feet. Only fold until there are no traces of egg whites. The mixture will look like slow-moving lava, similar to cake batter.
- Transfer the batter to the pastry bag. Pipe out rounds roughly 1-1/4 inch around about 1-inch apart onto the baking sheets. Here is a great video to show how to pipe the “perfect” Macaron.
- Place the piping tip on the tray at a 45 degree angle
- Keep the tip still and pipe into the mound of mixture, the mixture will spread a little, but form a circle
- Pull the tip up when you’ve reached your desired size and the peak will fall back into the mixture. It will take a couple tries (especially if it’s your first time) to pipe out consistent circles each time, but you’ll get the hang of it
- Once all the rounds are piped out, pick up the baking sheets and bang them against the work surface to create the Macaron “base” or “foot”. This will ensure that all of the air bubbles are out of the mixture.
- Let the rounds sit at room temperature for 30 minutes to dry the tops (when you touch the tops, they won’t be sticky anymore)** Here’s the 3rd spot that varies per recipe. The 1st and 2nd batch I made, I did not let the rounds sit, but popped them right in the oven. The 1st batch rose and had feet, but second batch was flat. People say that it doesn’t matter, but letting them set worked for me, so I’m stickin’ to it! This is a good time to grab a glass of wine or maybe clean up your work surface a bit. I prefer the wine!

- Once dried, or after your wine glass is empty, pop the macaroons in the oven. Bake for a total of 14 minutes, rotating the sheets half way through. If you’re using a convention bake, you may want to leave the Macarons alone for the full 14 minutes. Opening the oven is a tricky task as you don’t want to lose the oven temperature and cause your rounds to become hollow. With that said, I rotated mine half way though and they came out great! Rule of thumb: If you don’t have to open the oven, don’t!
- Take the rounds out of the oven and let them sit on the baking sheet for roughly 3 – 5 minutes and then transfer to a rack to cool completely. Do not fill the Macarons until they are completely cooled.

Chocolate Ganache Filling:
What You Need:
- 4 Ounces of Bittersweet Chocolate, finely chopped
- 1/2 Cup of Heavy Cream
- 2 Tablespoons of Unsalted Butter (1/4 stick), at room temperature & cut into cubes
Instructions:
- Warm the cream in a small saucepan over medium heat until it just starts to boil
- Take the cream off the heat and slowly stir in the chocolate without creating any bubbles. Let sit for 1 minute
- Add the butter and stir until smooth
- Cover with saran wrap so that the wrap is touching the top of the ganache and let it chill in the refrigerator until thickened, about 30 minutes.
Salted Caramel Filling:
What You Need:
- 2 Tablespoons of Thick Caramel – You can be ambitious and make your own through How to Cook That, but I just purchased jar of Caramel at the store
- Additional 1/2 Cup of Thick Caramel
- 1/2 Cup of Butter
- Pinch of Sea Salt Flakes
Instructions:
- Keep the 2 tablespoons of Caramel off to the side for now.
- Combined the 1/2 Cup of Caramel with the 1/2 Cup of Butter and the Sea Salt and beat until smooth. Set aside in the refrigerator to thicken, about 30 minutes.
The Assembly
- Pair Macarons of similar size
- Remove the Ganache from the refrigerator and transfer to a piping bag
- Remove the Salted Caramel from the refrigerator and transfer to a piping bag
- Warm the 2 tablespoons of thick caramel that was not used in the recipe and spoon a small amount into the center of one half of the shells ** You’re only going to place filling on the bottom round and leave the top bare for easy assembly
- I did half chocolate ganache and half salted caramel, so know in advance which ones you’re going to do as each flavor. Place about 1 teaspoon of the ganache OR salted caramel on top of the thick caramel you placed in the center of the Macaron half.
- Place the top on and press gently so that it looks like a mini hamburger.
- Refrigerate, covered, at lest 24 hours before serving to let the filling set.

After several attempts, it was a wonderful success to finally get them right! I hope I didn’t scare you too much with my failed attempts. These are fun bite sized (or 2 bites depending on the person!) treats to share at parties or to keep all to yourself.
Enjoy!
Kristin


They look so delicious! 🙂
Thank you Arielle! Once I got the hang of it, I really enjoyed making them. The first time I took them out of the oven and it was a success, I was so excited! I can’t wait to make more and play around with different flavors and colors
I’ve totally made these! I also like putting a teeny amount of caramel in the middle and surrounding it with a ring of ganache. The flavor combination is amazing…
That sounds amazing! I did put some caramel with the chocolate ganache, but I’m thinking of adding a bit more next time. I was so excited they came out so well (after a couple tries)!