Tag Archives: Baking School

An Old Favorite

3 Feb

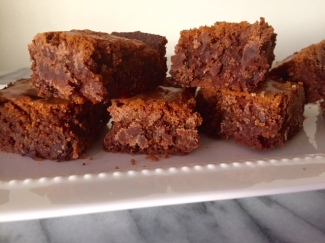
West 10th Street Brownies

In 2011, I took a baking class at The Institute of Culinary Education (ICE) at 50 West 23rd Street in New York City (Amazing class! I would recommend any of the classes offered at ICE. Check them out at ICE). The class was called “The Best Brownie Workshop” and was a collection of Nick Malgieri’s brownie recipes. Nick is the former Executive Pastry Chef at Windows on the World, is a 1996 inductee into Who’s Who of Food and Beverage in America. His twelfth and latest book is NICK MALGIERI’S PASTRY: FOOLPROOF RECIPES FOR THE HOME COOK. He was voted one of the ten best pastry chefs in America by Chocolatier and Pastry Art and Design magazines in 1998 and 1999, and he is the director the baking program at ICE. Check him out at Nick Malgieri.

Of course, I keep all the folders and pamphlets from past classes I take and these brownies have been a ‘go to’ for me for years now. I haven’t made them in quite some time, but it was a colleague’s birthday and these brownies were the perfect solution.

Story behind the West 10th Street Brownies:

“The name of this recipe is because I found it in Greenwich Villiage a few blocks from where I live. As I walked east on Tenth Street, I saw a yellowed index card lying on the sidewalk. When I picked it up and saw written in spidery hand in blue fountain pen ink a recipe for ‘The Best Brownies in the World.’ Well, I put it aside in a miscellaneous recipe file, and a few months later tried it. They turned out to be sensational and certainly a contender for the title.” – Nick Malgieri

I hope you enjoy them as much as I do!

FullSizeRender_2

Prep Time          Cook Time          Total Time
15 Minutes          30 Minutes          45 Minutes
___________________________________________
Yields: ~24 2-inch Brownies

Ingredients:

  • 16 tbs (2 sticks) unsalted butter
  • 3 ounces unsweetened chocolate, cut into 1/4 inch pieces
  • 4 large eggs
  • 1/2 tsp salt
  • 1 tsp vanilla extract
  • 2 cups sugar
  • 1 cup all-purpose flour
  • 1 Tsp of Cinnamon (*my personal addition the the recipe*)
  • 1 cup (6 ounce bag) semisweet chocolate chips
  • 19 x 13 x 2-inch pan

Instructions:

  1. Set a rack in the middle level of the oven, preheat to 350 degrees Fahrenheit and butter the pan well
  2. In a saucepan, melt the butter over medium heat. Once melted, remove from heat and add the 3 ounces of unsweetened chocolate. Let it sit for 2 minutes, then whisk until smooth. *If not all the chocolate has melted, add back to very low heat and stir constantly. Chocolate can burn rather quickly, so make sure to remove from heat  just before it is fully melted*
  3. In a large bowl whisk together the eggs, salt & vanilla until just mixed.
  4. Whisk in the sugar in a constant stream
  5. Whisk in the chocolate butter mixture
  6. In a separate bowl, mix together the flour and cinnamon, switch to a rubber spatula and fold into the chocolate/egg mixture.** Fold technique: The reason the flour is folded into this recipe rather than just mixed is to keep the air inside. This is what creates the airiness and volume in cakes and brownies. To fold in the flour make horizontal sweeping motions, like you’re folding what’s already in the bowl over the flour that you’ve added. Each time I do one sweeping motion I rotate the bowl slightly so that I’m folding from different angles and making sure I haven’t missed any of the flour. Make sure to scrape down the sides and bottom of the bowl as well.** Careful: One of the biggest mistakes people (including myself sometimes) make when it comes to brownies is over mixing. **
  7. The batter may still be warm from the melted butter and chocolate. If so, set it aside until it has cooled to room temperature (test it with your fingertip). Once cooled, fold in the chocolate chips until just combined.
  8. Pour into the prepared baking dish and level with an offset spatula
  9. Bake for 30 minutes, or until a toothpick inserted in the center comes out clean.
    FullSizeRender_1
  10. Transfer the pan to a wire rack and let them cool completely, roughly 1 – 2 hours.
  11. Wrap the pan in plastic wrap and refrigerate for at least 4 hours or overnight is best.
  12. Once cold, transfer to a cutting board, measure two-inch squares and cut into pieces and eat them!

FullSizeRender


Enjoy!

Kristin

A Flashback for Friday

28 Aug

Lately I’ve been reminiscing about my time during baking classes at the French Culinary institute in Manhattan, NYC (Now known as International Culinary Center (ICC)). I took 1 semester long class over a 12 week period every Saturday from 8am to 3pm. I learned more in those 12 weeks about baking then I could have imagined from tricks like:

  • Lemon juice prohibits apples from turning brown when you chop them
  • Best way to have room temperature eggs is to submerge them in warm water for 5 minutes rather than leave them out for hours

To key facts such as:

  • Gluten: Flour in contact with water – The more you work the dough the more gluten is released. When you overwork pastry it becomes bread because you’re releasing too much gluten into the dough.
  • One of the biggest differences in the types of flour is the amount of protein. Bread Flour has the most protein, then All-Purpose and Cake Flour has the least amount.
  • Emulsify – Combining 2 liquids that don’t combine easily – When you add an egg 1 at a time into the recipe like we did in the New York Crumb Cake
  • The greater the fat content in butter, the better the butter is (Go figure!). In the class we use butter with 82% fat

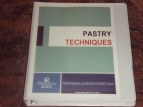
OLYMPUS DIGITAL CAMERA OLYMPUS DIGITAL CAMERA the-fundamental-techniques-of-classic-2986l1

Over the past year I have been more into cooking than baking, especially in preparation for my wedding in October, but lately I have re-found my passion for pastries, cakes, cookies and the like. Looking back over some of the photos and recipes from my Pastry Techniques book made me nostalgic towards a kitchen covered in flour, sugar and fondant

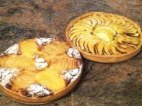
tart OLYMPUS DIGITAL CAMERA  palmiers

OLYMPUS DIGITAL CAMERA OLYMPUS DIGITAL CAMERA Napoleon

I’ve been ambitious lately in my thoughts for my next creation… Especially coming close to fall (I know, I know… I’m not ready for summer to be over yet either!) it is my favorite time to of year for pumpkin cupcakes and apple pies!

Get ready, Kristin’s Cravings is back at it!

Enjoy!

Chocolate & Butter Croissants

5 Dec

Croissants are one of my favorite morning pastries. They’re flaky, savory and delicious and I’m shocked I haven’t made them before now. This past week in baking school was pretty hectic. The plan was to make chocolate butter-cream filled macaroons, butter croissants and chocolate croissants, but we ran out of time and only had enough time for the macaroons and the preparation of the croissant dough. Since I had my hopes up for some fabulous croissants the next morning (and I’m too impatient to wait a week!) I decided to make them on my own.

Interesting to note: have you ever noticed that there are some croissants that are straight and others that are curled?


Well, apparently this is not just a preference of the bakery, it actually has meaning. In France, a straight edged croissant is made from butter whereas a curled croissant is made from margarine. It is a way to cut costs since good butter can be very expensive, so the curled croissants are often cheaper, but the strait ones are better quality.

What You’ll Need:

Dough: Very similar to Puff Pastry (This makes 20 – 24 Croissants)

  • 500 Grams of Bread Flour (3.5 Cups) *
  • 65 Grams of Granulated Sugar (1/3 Cup)
  • 2 Tsp of Salt
  • 40 Grams of Softened Butter
  • 25 Grams of Yeast (2 Tbs)
  • 125 Milliliters of Milk
  • 124 Milliliters of Water
  • 300 Grams of Cold Butter

Croissant:

  • The Dough from above
  • 6-8 Ounces of Chocolate
  • Egg Wash (1 slightly beaten egg + 1 Tsp of water)

Directions:

For the Dough:

Combine the flour (make sure to see the note below with regards to the bread flour), sugar, salt and yeast (if dry yeast) in a mixing bowl. If you’re using an electric mixer you are going to use the paddle attachment to combine the ingredients. Then add the softened butter and mix.

If using fresh yeast, dissolve it into the water and mix, then add the liquids into the dry mixture and mix until just combined. The dough will be flaky and won’t come together as other doughs you may have worked with. Don’t add more liquid to it because it is supposed to be like this. Kneed it in the bowl a little until it starts to come together and then place it on your work surface, kneed lightly into a ball, wrap in plastic wrap and chill for 30 minutes. The composition of your dough right now is a precursor to how your croissant will turn out after baking. A croissant is very flaky, light and airy, so if your dough is thick, wet and dense it is going to prevent the dough from rising properly which is what gives the dough its texture.

As with the Puff Pastry, you are going to turn the dough after it has rested. Unlike the Puff Pastry, you are only going to do 3 turns to the dough. Doing 6 turns will make the croissant too flaky. As my Chef in class would say, they’d be Cork Flakes.

After the last turn, let the dough sit in the fridge for roughly 40 minutes. When ready, place the dough on your work surface and cut in half. Roll each half out so that the width is around 8 inches and the length as long as need be to reach 3/8ths of an inch thick. One will be used for plain butter croissants and the other will be for chocolate croissants.

For Butter Croissants:

Starting at the bottom left corner, place your knife at an angle to create a right triangle and cut your first piece. Then, where the tip of your knife just was, cut straight across the dough to create your second piece. Repeat these steps until you reach the top of the dough.

Place one piece in front of you so that the wide end is farthest from you and the tip facing you. Cut a slit, roughly half an inch long down the center of the top. Fold the pieces away from you and slightly press down with you fingers

Using both hands, place your finger tips at the top and the your thumbs in the center with your hands at a slight angle so that you’re forming an arrow with your index fingers. Roll the dough down and out so that you stretch the dough wider as you roll down. Then, when you’ve rolled a little more than half way down place one hand on top of the dough, with the other hand grab the tip of the dough and stretch lightly down as the other hand rolls the dough until your hands meet. Place the croissant on a piece of parchment paper on a baking sheet with the tip facing down. You don’t want the tip on top, or the croissant will open while rising and/or baking and you don’t want the tip all the way under because that will restrict the dough from rising.

For Chocolate Croissants:

Chop the chocolate into 4 inch long, 1/4 inch wide pieces.

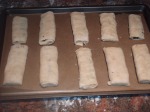
Place the second sheet of rolled puff pastry on a floured surface in front of you. Cut 10 (or as many as you can) rectangles that are a little wider than the length of a chocolate piece and 4-5 inches long. Place a piece of chocolate at the top, roll the top of the dough over the piece of chocolate and press lightly with your fingers. Place a second piece over chocolate just in front and roll the dough over that piece twice until the seam is on the bottom. Place your hand directly on top and press lightly to seal.


Place the finished croissants, as you did with the butter croissants, on parchment paper on a baking sheet.

Once all the croissants are rolled and on their designated baking sheets, its time to proof them (aka let the dough rise). If you recall from the Cinnamon Sugar Pull-Apart Bread I made back in May, I had a great method in college for proofing dough, but it seemed to have failed in my NYC apartment resulting in blown fuses and a dark apartment. Well, luckily for me the problem has been solved! I was talking with another member of my baking class and he mentioned that a great way to proof your dough is to just put the light in your oven on and place the dough in there. The light will create enough heat and it will be undisturbed. It worked like a charm and saved me from the confusion of my fuse box!

Anyway, I let the dough proof for roughly an hour to an hour and a half or until they nearly double in size.

Once the croissants are proofed, preheat the oven to 350 degrees F and bake for 30-35 minutes or until the tops are golden brown, rotating the pan half way through. Let them cool on the backing sheet for about 5 minutes before transferring them to a wire rack to cool completely.

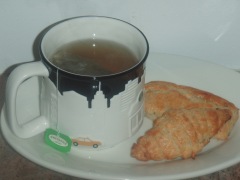
Serve warm with some butter and coffee.

Enjoy!

* Bread Flour contains 12 to 14 percent protein, whereas all-purpose flour only has between nine and 11 percent protein. When you use all-purpose flour in a recipe calling for bread flour you can use the exact same amount of flour but you may find that breads take longer to rise or do not have the same density they would have if you had used bread flour.