Tag Archives: Strawberries

New York Style

10 Sep

Classic Strawberry Cheesecake

whole thing side

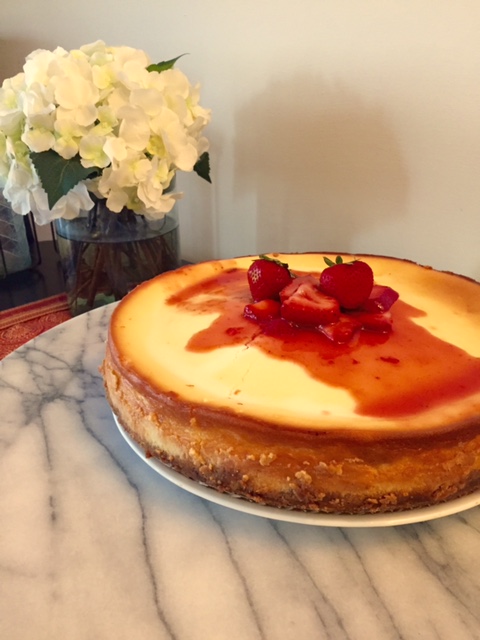
I’m going to come right out and be up front here… I don’t like Cheesecake. I know, general statement. I’ve only tried a couple different kinds. Typically, my goal when I don’t like a certain dessert is to find a way to make it so that I do like it. The New York Style Strawberry Cheesecake however, is an exception. You just don’t mess with it, kind of like New Yorkers in general.

There are several different variations on how to make Cheesecake, from ingredients to oven techniques. I’ve tried 2:

  1. No Water Bath
  2. Variation of the water bath
    *Water bath is cooking the cheesecake by placing the spring-form pan inside a roaster/pot of boiling water. it helps to regulate the temperature and protect the cheesecake while it is cooking.

The first one I made with no water bath came out burnt on the top, the crust was overcooked and it was slightly uneven. For the water bath method, rather than putting the spring-form pan directly in the pan of water, I placed a pot of water on the rack directly below and the cheesecake came out beautiful!

Another trick I found to keep the top smooth: do not use convection bake on the oven, just use regular bake. I made this mistake on my first cheesecake as well which was one of the causes of the unevenness. As you work through the recipe there will be some additional tips along the way. Hopefully at the end you’ll have a dreamy and delicious dessert to share!

Classic Cheesecake

From the top

What You’ll Need:
Crust:

  • 1 3/4 Cups of Graham Cracker Crumbs (~9 Graham Crackers)
  • 3 Tablespoons of Granulated Sugar
  • Pinch of Salt
  • 1/2 Stick (4 Tablespoons) of Unsalted Butter, Melted

Cheesecake:

  • 2 Pounds (Four 8-ounce boxes) of Cream Cheese, at room temperature – I used the Philadelphia Cream Cheese that are the solid, rectangular boxes. The cream crease in the tubs have air whipped into them and won’t work the same way as traditional blocked cream cheese
  • 1 1/3 Cups of Granulated Sugar
  • 1/2 Teaspoon of Salt
  • 2 Teaspoons of Pure Vanilla Extract
  • 4 Large Eggs, at room temperature
  • 1 1/3 Cups of Sour Cream or Heavy Cream, or a combination of the two:  The sour cream will give you a tangier cheesecake, which is a more traditional “New York Classic”, while the heavy cream is milder. As long as you keep the measurement at 1 1/3 cups, you can use whatever combo of the two you’d like

Strawberry Topping:

  • 1 Cup of Sliced Strawberries
  • 1/4 Cup of Light Brown Sugar
  • Pinch of Salt
  • 1/2 Cup of Strawberry Jam
  • 1 Tablespoon of Lemon Juice

Instructions: 

  • Crust
  1. Preheat the oven to 350 degrees F and center the rack in the oven
  2. Butter the bottom and sides of your spring form pan and place a fitted piece of parchment paper on the bottom.  I used a 10.25-inch Spring-form pan, but you can also use a standard 9-inch. Just make sure the sides of the pan are at least 2 3/4-inches high (if they’re lower, you’ll have some batter leftover).
  3. Use a food processor to breakup the graham cracker into crumbs and mix together with the sugar and salt in a medium sized bowl.
  4. Pour the melted butter over the mixture and stir with a fork until all of the dry ingredients are uniformly moist.
  5. Turn the ingredients into the buttered spring-form pay and pat an even layer of crumbs along the bottom of the pan. You can use the bottom of a drinking glass or measuring cup to flatten out the crust to get a uniform layer.
  6. Place the spring-form pan on a baking sheet and bake for 10 minutes. The sides of the crust should be just browning slightly when it’s done.
  7. Set the crust aside to cool on a rack while you make the cheesecake.

crumbs

  • Cheesecake
  1. Reduce the oven temperature to 325 Degrees F and put a kettle of water on to boil
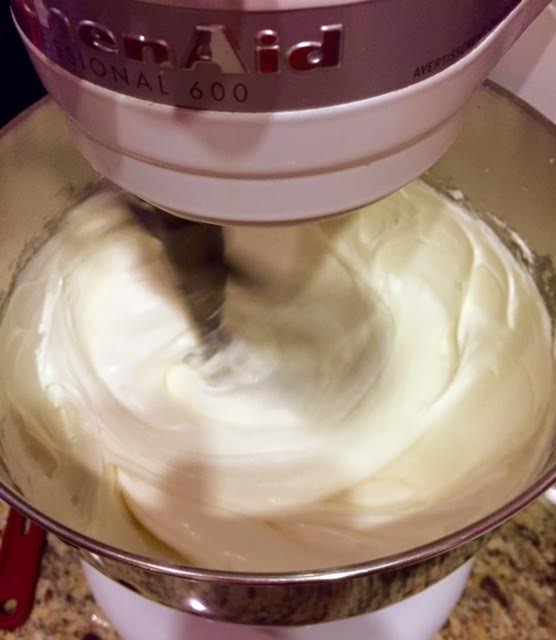
  2. Working with a standing mixer fitted with a paddle attachment, beat the cream cheese at medium speed until it is soft, roughly 4 minutes. With the mixer still running, add the sugar and salt and continue to beat for an additional 4 minutes until the cream cheese is light. You’ll start to see the creamy nature really come through here. Scrape down the sides of the bowl.Kitchen Aide
  3. Beat in the vanilla and add the eggs, one by one, beating for a full minute after each addition — you want a well-aerated batter, but not over-beaten. Scrape down the sides of the bowl.
  4. Reduce the mixer to low speed and stir in the sour cream and/or heavy cream
  5. Take the bowl off the mixer and give the batter a few stirs with the rubber spatula, just to make sure nothing has been left unmixed at the bottom of the bowl. cheese cake and crust
  6. Make sure the sides of the spring-form pan are well greased and scrape the batter into the pan
  7. Pour the boiling water into a large pot or roasting pan and place it in the oven on the bottom rack.  This will regulate the baking temperature since the temperature of water never exceeds boiling point (it turns into steam), it keeps the cheesecake baking at an even, slow temperature. This prevents the cheesecake from overcooking (especially around the edges). the steam created further protects the baking as it keeps the air in the oven moist and humid to prevent the top of the cake from drying out and cracking. 
  8. Place the spring-form pan on the center rack, just above the pan of water and bake for 1 hour and 30 minutes. Now, no matter how tempted you are, DO NOT OPEN THE OVEN! Any slight change in temperature will cause cracks in the cheesecake or allow it to sink in the middle. 
  9. Turn off the oven after the 1.5 hours and prop open the oven door for 30 minutes to 1 hour and let the cheese cake cool slowly. You’ll see that the cake is done when the sides are sturdy, but the middle wiggles a little.
  10. Carefully take the pan out of the oven and let it come to room temperature on a cooling rack
  11. Once the cake is cool, cover the top lightly with plastic wrap and chill it in the fridge for at least 4 hours or overnight which is better
  • Strawberry Topping
  1. In a large bowl, toss together the sliced strawberries and the sugar. Let it sit for 30 minutes, stirring occasionally
  2. Whisk the jam until completely smooth and place in a small saucepan. Bring to a simmer over medium-high heat, stirring frequently until the jam is dark and no longer frothy, about 3 minutes. Stir in the lemon juice.
  3. Pour the jam mixture over the strawberries and stir to combine
  4. Allow the mixture to cool to room temperature, then cover with plastic wrap and refrigerate until cold, at least 2 hours

To Serve

To un-mold the cheesecake, wrap a hot kitchen town around the outside of the pan and hold in place for 1 minute. Using a sharp knife, move around the edges of the cake to make sure it is separated from the sides of the pan. Remove the sides and then slide a thin metal spatula between the crust/parchment paper and the bottom of the pan to loosen, then slide the cheesecake onto a serving platter. If you prefer, you can also leave the metal bottom under the cake and place it on the serving plate (for a first time, it’s definitely the safe way to go!). Let the cheesecake sit at room temperature for 30 minutes before serving. Drizzle the strawberry topping over the slice and drift away in a dreamy, creamy cheesecake!
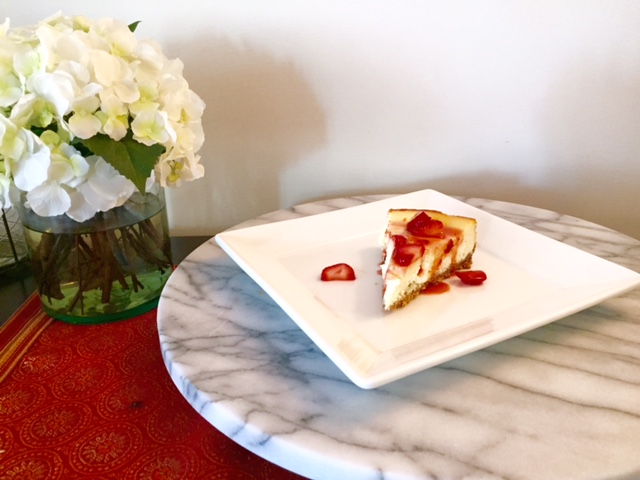
Distance Slice

Enjoy!
Kristin

Birthday Cake!

26 Jul

As you saw from my last post, this past weekend was my friend’s birthday. One thing you should know about me is that I love birthdays! Whether it’s my birthday, my friend’s birthday or anyone’s birthday, it is a wonderful time to celebrate and bring everyone close to you together.

For her birthday, I decided to whip together a 4 layer vanilla cake with homemade chocolate ganache and strawberries. To any of you on the East coast, you know how hot and humid it was last Friday. We reached triple digit temperatures in NYC and as I was getting out of a cab at Grand Central Station, the ratio reported that it was 102 degrees F, but felt like 112 degrees F. This was definitely not the best conditions to travel with a cake, but I did my best. I rushed through Grand Central at 5:30pm on a Friday (which is a task within itself without a cake!), made it onto a Metro North train, walked through several cars to find a seat and sat for 2 hours in a non-air conditioned car hoping the cake wouldn’t melt! There was some reconstruction when I finally arrived, but I made it. Cake intact and it was delicious!

What You’ll Need:

Cake:

  • 2 Cups of Sugar
  • 3 1/4 Cups of All-Purpose Flour
  • 2 1/2 Tsp of Salt
  • 3/4 Cup of Unsalted Butter, Softened – See Baking Tips – Softening Butter
  • 1 1/4 Cups of Milk – Room Temperature
  • 2 Tsp of Vanilla Extract
  • 4 Large Eggs

Ganache:

  • 12 Oz of Bittersweet Chocolate
  • 8 Tsp sugar (Optional)
  • 4 Cups of Heavy Cream

To Prepare:

  • Preheat oven to 350 degrees F
  • Lightly grease and flour two 9″ round cake pans

** To Note ** The Ganache will need to chill in the fridge for a minimum of 6 hours or overnight.  It can be made 4 days                                    in advanced

Directions:

Ganache:

Let’s start with the ganache. Per the not above, the ganache can be made up to 4 days in advance, but must be made at least 6 hours before you are ready to frost the cake.

Chop up 12 ounces of chocolate into small pieces, place in a large bowl and set aside.

In a large saucepan over medium-high heat, heat the heavy cream and sugar (if using) until it simmers gently. Be sure to stir occasionally so that the heavy cream does not begin to curdle. Immediately pour the hot cream over the chocolate and stir gently until the chocolate is mostly melted.

Let the mixture stand for 15 minutes to be sure that all of the chocolate has melted. Once melted, stir the ganache gently until it is perfectly smooth, let cool.

Once the ganache has cooled, cover and chill for at least 6 hours, preferably overnight. A trick to covering a liquid like this is to place the Saran wrap directly on the surface of the mixture. This prevents a film from forming over the top of the mixture.

Cake:

In the meantime, while the ganache is almost done chilling, let’s focus on the cake.

In a large mixing bowl fitted with an electric mixer, whisk together the sugar, flour, baking powder and salt.

Cut the butter into Tbs sized pieces, place into the flour mixture and beat with an electric mixer at low-speed until it begins to resemble a sandy consistency.

In a small bowl, combine the milk and vanilla separately and then add to the mixture all at once. Mix in at low-speed for 30 seconds, then increase the speed to medium and beat for another 30 seconds. Be sure to scrape the sides and bottom of the bowl to make sure the mixture is fully combine.

With the mixture running on low-speed, add 1 of the eggs. Increase the speed to medium and beat the egg into the mixture for 30 seconds. Place the mixer back to low-speed and repeat this process, one egg at a time, with the remaining 3 eggs. You’ll notice that after each egg is added the mixture will begin to look thicker and more fluffy.

Once the last egg is added, scrape the sides and bottom of the bowl one last time, then beat at medium-high speed for 30 seconds to make sure the mixture is fully combine. The mixture should be very heavy, but fluffy. Pour the batter evenly between the two prepared panes and level with an offset spatula.

Bake for 30 minutes, rotating half way through, or until a toothpick inserted in the center comes out clean. Remove the cakes from the oven and place on a rack to cool for 10 minutes before removing from the pan.

Once cooled, insert a knife between the cake and the edge of the pan to make sure the cake comes out clean. Remove the cakes from the pans and place on a cooling rack until completely cooled, a minimum of 1 hour.

Once the cakes are completely cooled and its coming time to remove the ganache from the fridge, slice each cake horizontally so that you are left with 4 layers of cake. This is and optional step. I chose to make a 4 layer cake, but it is up to you as to many layer you chose to have. If you plan to only use 2 layers, skip down to ***.

As a note for later, when it comes time to assemble the cake, you will use the bottom of one of the sliced cakes as the bottom of the final cake and the bottom of the other sliced cake as the top of the final cake. The bottom piece that is used at the top of the cake will be flipped over so that the final cake has a flat smooth top surface.

*** In preparation for assembling the cake, wash and cut the strawberries into halves or quarters depending on their size, place in a bowl and set aside.

Ganache:

Now, back to the ganache. Once the ganache has fully chilled for a minimum of 6 hour and you are ready to start assembling the cake, take it out of the fridge and remove the Saran wrap.

The ganache will still be creamy. Slowly, with a rubber spatula, begin to whip until it is stiff enough to hold a nice shape and seems spreadable.  Be sure not to over-whip the ganache or it will begin to look granular.

You are now ready to assemble the cake!

I’ve found that the easiest and cleanest way to assemble a cake is to place 2 pieces of parchment paper on the cake stand so that they meet in the middle and place the middle of the bottom layer of the cake right where the pieces meet. This way, once the cake is frosted, you can pull the sheets out from under the cake and the stand will remain clean.

Scoop up a portion of the ganache and place it in the center of the bottom layer. Smooth it out evenly and add more if need be. Make sure there is a good layer so that when you place the next layer on top, it is raised a bit.

Once the ganache is spread evenly:

  1. For the 2 layer cake: Place the cut up strawberries on the layer of ganache. Take more of the ganache and spread it evenly over the top of the strawberries. Then, carefully place the top layer of the cake directly on top. Skip down to ***.
  2. For the 4 later cake: I only put strawberries in the center of the cake, so after the bottom layer is frosted, place the second layer directly on top (per the note above, make sure that it is not one of the bottom pieces! That will be used as the top layer). Frost this layer as you did with the bottom layer. Then, place the cut up strawberries on the layer of ganache. Take more of the ganache and spread it evenly over the top of the strawberries. Place the 3rd layer directly over the top and frost as you did the previous layers. Then, the top layer should be the bottom of one of the sliced cakes. Flip it over and place directly over the layer of ganache as you did with the previous layers.

*** Now that the cake is fully assembled it is time for frost the sides and top.

Starting with the sides, with an offset spatula, scoop up the ganache and spread evenly around the sides of the cake. Make sure not to be shy. You want to cover and get into all the creases of the cake. Once the sides are fully frosted, scoop the remainder of the ganache onto the top of the cake. Spread evenly. Now, go around the cake and smooth out any bumps, lumps or uneven edges to give the cake a crisp clean look.

For the finishing touches, I took a semi-sweet chocolate bar and shaved the edges over the top of the cake and placed 3 strawberries at the center.

Carefully, remove the parchment from below the cake and you are ready to serve!

Enjoy!

Design a site like this with WordPress.com
Get started