Giving It Another Shot!
I started on my bread making adventure when I was in college. The outcome was great, but the process had some major flaws… One major flaw in particular: I blew a fuse in the apartment EVERY. SINGLE. TIME. The apartment was somewhat drafty and to let the bread rise in a dark, quiet, warm place I would need a space heater in the back of the apartment. Never fail, 20 minutes later, the apartment was dark and shut down.
I decided to give it another go now when I moved to NYC… same problem. This apartment was much smaller and I decided it was probably a fire hazard and I should just quit the whole bread attempt. There are literally millions of other things to bake, stop with the bread Kristin!
Well, I’m stubborn and in a new apartment, but this time, IT WORKED! And it was delicious!! I decided on Challah Bread and ended with some fabulous french toast for breakfast!

Prep Time Cook Time Total Time
3 – 3.5 hours 30 min 3.5 -4 hours
____________________________________________________
Yields: 1 Loaf
Ingredients:
- 2 Tsp of Active Dry or Instant Yeast
- 1 Cup of lukewarm Water
- 4 – 4.5 Cups of All-Purpose Flour
- 1/4 Cup of Granulated Sugar
- 2 Tsp of Salt
- 2 Large Eggs
- 1 Large Egg Yolk (Keep the Egg White for the Egg Wash you’ll use later)
- 1/4 Cup of Vegetable Oil
Instructions:
- Sprinkle the yeast in the lukewarm water with a pinch of salt. Stir to dissolve the yeast and let stand until you see a thin frothy layer across the top of the mixture. When you see the froth, this means that the yeast is active and ready to use.
- Whisk together 4 cups of flour (save the last 1/2 cup to the side), sugar and salt in the bowl of a standing mixer (or large mixing bowl if you’re kneading by hand)
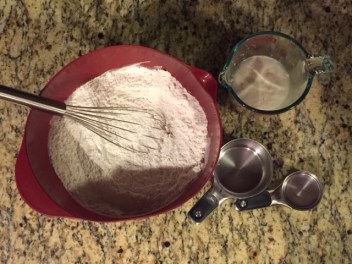
- Make a well in the center of the flour mixture and add the eggs, egg yolk and oil. Whisk these together to form a semi-liquid mixture pulling in a little flour from the sides of the bowl.

- Pour the yeast mixture over the egg mixture and mix with a spoon until you form a shaggy dough that is difficult to mix

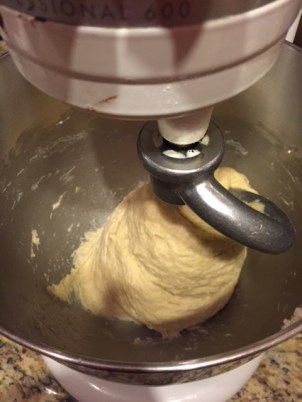
- With the dough hook attachment, knead the dough on low speed for 6 to 8 minutes (or, if by hand, turn the dough onto a floured work surface and knead by hand for about 10 minutes). If the dough seems sticky, like bubblegum, add the excess flour, a teaspoon at a time, until it feels tacky, but no longer sticky. The dough is finished kneading when it is soft, smooth and holds a ball-shape.
- Transfer the dough to an oiled bowl, cover with plastic wrap, and place somewhere quiet, warm, and dark. I placed mine in my over (with the heat off!). Let the dough rise until doubled in size, roughly 1.5 to 2 hours.

- Braiding the Dough: There are two routes you can go here: (1) Standard 3-stranded braid, or (2) 6-stranded braid.
- 3-Stranded Braid: Separate the dough into 3 equal pieces and roll into a long rope, 1 inch thickness and 16 inches long. Cinch at the top, fold under and braid down. Cinch at the bottom and fold under.
- 6-Stranded Braid: Separate the dough into 6 equal pieces and roll into a long rope, 1 inch thickness and 16 inches long. Cinch at the top and fold under. The game plan here is “over two, under one, over two” always starting from the far right rope. Carry the right-most rope over the two ropes beside it, go under the middle rope, then carry it over the last two ropes. Lay the rope down parallel to the other ropes. It is now the furthest-left strand. Continue using the right-most rope, follow the pattern and make the braid as tight as possible. Your braid will start to shift left as you go and it is OK to lift it up and recenter if you need to. Once you reach the end, squeeze and cinch the ends of the rope together and tuck them under the loaf. If the rope seems too long, it is OK to plump it together carefully.


- Line a baking sheet with parchment paper and place the loaf on the paper. Sprinkle with a little flour and drape a dishcloth over the top. Place the pan in a warm spot, away from drafts and let rise until puffed and pillowy, roughly an hour (Do NOT place in the oven this time because half way through you’ll need to turn the oven on to pre-heat). Try not to peek! 🙂


- About 20 minutes before baking, heat the oven to 350 degrees F. When ready to bake, whisk the reserved egg white with a tablespoon of water and brush all over the Challah. Be sure to get into ALL the nooks and crannies as well as down the sides of the loaf.


- Place the Challah in the oven and bake for 30 minutes, rotating the pan halfway through. The challah will be done when it is deeply brown.


- Let the challah cool on a cooling rack until just barely warm.


- Finally — Slice & Eat!!


No kidding, we ate this bread all weekend! It was a perfect addition to short-ribs, it made fantastic french toast and mid-day sandwiches. You name it, if we could make the bread fit, we did! I hope you enjoy it as much as my home did!
Enjoy!
Kristin