Tag Archives: Baking

Homemade Pizza

8 Jan

Friday Night: PIZZA NIGHT!

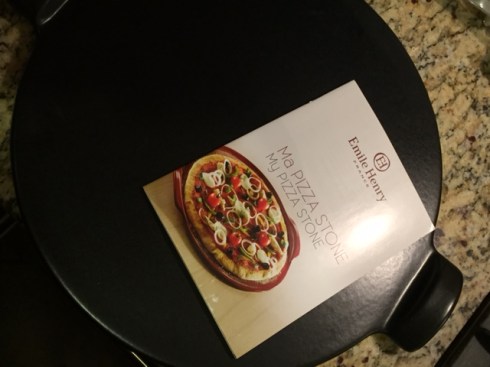
Growing up, my sister, brother and I would always have certain nights we’d get really excited about! Mainly, Sunday spaghetti and meatballs (The Sopranos night when it was still airing), our birthdays where we picked any meal we wanted, and Friday Night: Pizza Night. As I’ve gotten older, the typically Friday night doesn’t include Pizza anymore, but when it does, I really enjoy making it from scratch! It also helps that I just received a new Pizza Stone be Emile Henry from Crate & Barrel and was excited to use it!

IMG_2170

I love my pizzas super cheesy with pepperoni and lots of tomato sauce! I found a great recipe on  House of Yumm for a No Yeast Pizza Dough that was easy to whip up in about 5 minutes. The best part about it, you more than likely have all of the ingredients already in you cabinet: flour, baking powder, salt, milk & butter. In the time it takes you to make the dough and pop the pizza in the oven, Seamless would’ve just processed your order, it’s that easy!

IMG_2156

Prep Time          Cook Time          Total Time
5 min                   10 min                  15 min

Makes 1 large pizza

Ingredients:

  • 2 1/4 Cups of All Purpose Flour
  • 1 Tbs of Baking Powder
  • 1/4 Tsp of Salt
  • 1 Cup of Milk
  • 1/4 Cup of Butter (at room temperature)

Instructions:

  1. Preheat the oven to 450 degrees F
  2. I used a pizza stone which does not require any greasing, but you can also use a baking sheet lined with parchment paper.
  3. In a large bowl (I used my Kitchen Aid with the dough hook attachment) combine all the ingredients and mix on low speed until one ball of dough forms. If you don’t have a mixer, you can do this by stirring with spatula, or your hands, until the ball comes together. It’s a bit of extra work, but you’ll have some killer arms!
    IMG_2155
  4. Sprinkle flour onto your rolling pin, on your hands and lightly onto the counter you’re working on. Remove the ball from the bowl and pat down to form a solid ball.
    FullSizeRender
  5. Roll the dough into a ball and set onto the prepared baking sheet. Using the rolling pin, roll out the dough to the desired thickness. Average is about 1/4 of an inch, but it’s not a science, it’s your preference. The thicker the dough, the longer the pizza will need to be in the over, but be careful not to make it too think that you end up burning the toppings just to cook the dough!
  6. Cover the rolled out dough with tomato sauce leaving about an inch around the edge for the crust. I blend together Rao’s Marinara Sauce with their 4 Cheese Sauce.
  7. Add the rest of your toppings! I added sliced Mozzarella cheese, pepperoni and a little grated Parmesan on top:
    FullSizeRender_2
  8. Bake for 10 – 12 minutes on the bottom shelf of your oven until you see the crust browning and the cheese melting. Your nose is your best tool! When you start to smell the pizza, check it. Remove from the oven and allow to cool and set for roughly 5 minutes. Then, ENJOY!

As you can see, it was a success in my house!!

Enjoy!
Kristin

A Special Day to Celebrate!

6 Jan

Happy Birthday Mom!

I couldn’t be happier that my first cake of the new year is for my fabulous mom! Another year at 29 and I can’t wait to celebrate tonight!

IMG_2201

I have to say, I’m pretty lucky to have grown up with my mom at my side and even luckier to have her as my friend as an adult. Things like: “clean up your room before the cleaning lady comes” and “I’m going to make chicken tonight for dinner” all seem to make sense now when I look back, but I have to admit, when I was younger I thought she was crazy!

I really struggled to come up with an idea for my mom’s birthday cake. I mean, what do you make for one of the most important women in your life? It has to be fantastic! I wanted it to be elegant, but fun with a bit of flair. She mentioned a while back that she thought the cakes that look like presents are really cute, so I started with that and expanded from there.

As you know from my previous New Years post, I love the contrast of black and gold with a pop of color. I knew I would cover the cake with black fondant, but then had to work out the details from there.

The cake is my ‘go to’ vanilla cake recipe which you can find Here with chocolate buttercream filling. Needless to day, I cannot WAIT to devour this cake tonight!

Continue reading

And So It Begins…

4 Jan

The Start of a New Year

We have another year in the books we’re celebrating a fresh new path for 2016. What better way to start it off then with CAKE? Obviously!

FullSizeRender_3

After 2 weeks in Antigua (heavenly) for our honeymoon, running around NY for Christmas and hosting our friends for New Years, my husband and I are now back to the grind of our day to day. I have to admit, it was a whirlwind, but I wouldn’t have it any other way! Just to reminisce a little (because I’m not ready to give up the island mindset for the NYC aggression):

Christmas

Rob and I returned from our honeymoon on 12/23 and flew right into the Christmas spirit. As wonderful as 85 and sunny was, Jingle Bells just isn’t the same on the steel drums and I need my Michael Bublé Christmas! So, on Christmas Eve, went shopping, bought a tree, decorated the apartment, wrapped all of our gifts and last but definitely not least, made a Christmas Cake!

IMG_2138

My intention on this one was to keep it simple. I didn’t have a lot of extra time, it’ll be cute, won’t take too long, but it’ll be great. Then, I got carried away! This was such a fun little cake to make, but with all the details in the igloo, the snowman, the trees and presents I was finishing it up in the car ride out to Long Island!

igloo

I did keep it simple with the cake however. It’s my “go to” vanilla cake with buttercream frosting from my Just Because post. While the buttercream was still setting, I coated the outside with coconut shavings to have the appearance of snow. For the trees, I rolled green gum-paste into cones and snipped the edges with scissors as I went around from the top down and sprinkled with powdered sugar. A little tedious, but worth it! Needless to say, it was a successful Christmas!!

New Years

I knew I wanted to make a fun cake for new years and found some inspiration through various pictures on Instagram (follow me!! : @KristinsCravings) and Pinterest, but none were quite what I was looking for. I saw a photo from The Icing Artist that really stuck out to me, but I put my own twist on it (A video of her actual cake is HERE). I’ve always like the dramatic contrast of black with gold and even more so when I can add some pops of color.

I was slightly pressed for time this year (seems to be a trend!) since I decided I would also cook a full dinner of Chicken Cordon Bleu, baked potatoes and roasted brussel sprouts with pancetta, but it all came together fabulously!

Here’s a couple pictures of the process:

I wish everyone a wonderful, happy and healthy 2016 from Kristin’s Cravings!!

P.S. have I mentioned how much I LOVE my new apron!? (Thank you Uncle Tom and Aunt Eileen!!)

me apron

-Kristin

Design a site like this with WordPress.com
Get started